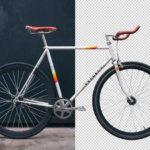
A photo does not always need heavy editing to look right. Often, the issue is simply how it is framed. There may be extra space, unwanted elements, or a slight tilt that makes the image feel incomplete. This is where cropping starts to make sense.
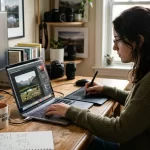
When you crop images in Adobe Photoshop, you are not just cutting parts of a photo. You are refining the frame so the subject stands out clearly. A small adjustment here can improve the overall composition without changing the original quality. At Plexail, this step is never rushed. It is often the starting point of making an image look clean and well-balanced.
Understanding Why Cropping Matters in the First Place
Every photo captures more than necessary. There may be extra space, background distractions, or elements that take attention away from the subject. Cropping helps remove these elements and focuses the image where needed. It also helps in improving composition. By adjusting the frame, you can make the image feel more structured and easier to look at. This is why cropping is often considered one of the most impactful steps in photo editing. It does not require advanced tools, but it does require attention.
Getting Familiar with the Crop Tool in Photoshop
The Crop Tool is simple to use and easy to locate. It is available in the toolbar on the left side of the screen, and you can also activate it by pressing C on your keyboard. Once selected, a crop border appears around your image. This border shows the part of the image that will remain. Everything outside this border will be removed after applying the crop. Small handles appear on the sides and corners of the border. These handles allow you to adjust the frame. Side handles move in one direction, while corner handles adjust both width and height together. It keeps the cropping process easy to handle.
Adjusting the Crop to Find the Right Frame
Cropping is rarely perfect on the first attempt. A few small changes are usually needed to make it look balanced. You can drag the handles inward to reduce the frame. You can also click and drag anywhere on the image to create a new crop area. After that, simply reposition the image inside the frame as needed. This is the better way; you can try a few options until the frame feels right.
As you adjust the crop, a grid shows up on the image. It breaks the frame into sections, making it easier to place your subject in the right spot. It may look simple, but it really helps improve the overall balance.
Framing Your Image Better with Grid Lines
The grid that appears while cropping is more than just a guide. It helps you avoid placing everything in the center. By aligning your subject slightly along the grid lines, the image feels more natural. This approach is often referred to as the rule of thirds, but you do not need to think about the term. You just need to follow the visual balance it creates. Photoshop also allows you to change the grid style if needed. This gives you different ways to guide your framing. At Plexail, this method is used to keep images visually balanced without making them look forced.
Cropping Without Sticking to a Fixed Size
Not every image needs to follow a specific size. At times, it feels better to adjust the frame based on what looks visually right. In Adobe Photoshop, you can freely crop an image by dragging the handles without locking it to any ratio. This gives you the freedom to focus more on the overall look instead of the exact dimensions.
Cropping Images to a Fixed Ratio
Sometimes an image needs to follow a fixed format, especially for social media, websites, or print. In Photoshop, you can choose from ready-made ratio options to match these needs. If none of them fit, you can simply enter your own width and height values. There is also a swap option that lets you switch between landscape and portrait with a click, so you do not have to start over.
Keep Your Edits Safe While Cropping
There is one setting you should always keep in mind while cropping. If the “Delete Cropped Pixels” option is left unchecked, the removed parts of the image are not lost permanently. This gives you the freedom to go back and adjust the crop whenever needed. It becomes useful when you are trying different frames or working on more than one version of the same image. In simple terms, it lets you make changes without worrying about losing any important part of your photo.
Straightening Images While Cropping
Sometimes, an image may look slightly tilted. This can affect the overall appearance, even if everything else is correct. Photoshop includes a straighten tool within the Crop Tool. You can draw a line along a reference point, such as the horizon, and the image will adjust automatically. After straightening, there may be empty areas near the edges. In the past, this would result in a tighter crop. These days, Photoshop gives you tools like content-aware fill and generative expand to handle those empty areas. They fill in the gaps using image details or create new ones for a smooth result.
FAQs
Q. How do you crop an image in Photoshop?
Open the Crop Tool, drag the edges to set your frame, move the image if it needs adjusting, and press Enter when you’re done.
Q. How do I crop an image to a specific size in Photoshop?
You can select a preset size or manually enter the width and height from the options at the top.
Q. Is it possible to apply the same crop settings to different images?
Yes, Photoshop remembers the last crop you used. You can also save those settings as a preset and reuse them whenever needed.
A good image does not always need complex editing. Sometimes, the right crop is enough to bring everything together. By adjusting the frame, removing distractions, and focusing on the subject, you can improve your images simply and effectively. If you want your visuals to look more refined and consistent, Plexail can help you handle them with the right approach.