Has it ever happened to you that you tried taking a perfect photograph with great attire, lighting, sharp focus, and natural expressions, only to realize that the background is completely ruining the image? When backgrounds are cluttered, distracting, or do not match the mood you were going for, the image feels flat and disappointing. Because it’s not only the subject alone that matters, the background equally plays an important role in setting the tone of the image. However, if you also have a collection of images with poor backgrounds, then you must use background editing or a replacement service.
To replace or change the background of a picture, you have two options: either to get the job done professionally or to change the background of a photo online for free using free background removal tools.
Using a free background remover or a free photo background editor tool is more beneficial when you are not using the image for any professional purpose and just want to play with backgrounds for fun. But if you are using the image for a commercial purpose or for marketing, social media, or professional designing, then outsourcing the background replacement or editing service to professionals is the right choice.
Professional editors have advanced skills to change photo background neatly and accurately, without distorting the image. Whether you want to get a dull sky replaced with a sunset, remove messy backgrounds, erase a tree from the background, or add a solid color or gradient behind the subject, they can help you with all. To outsource the background editing, you can always contact our team at Plexail.
However, if you want to change a photo’s background yourself and need a complete guide, then we are here with a step-by-step, easy guide to changing it. But before we discuss the steps, check out the top background removal software and tools, and beginner-friendly free online tools.
Professional background editing and removing software for high-quality images includes:
- Adobe Photoshop
- Adobe Lightroom
- CorelDRAW
Each of these software has a set of advanced tools that help to change or edit the backgrounds professionally. The quality of output generated using these designing software is high. Among these software, Photoshop is most used for removing or replacing the background. And for color edits or heavy editing, Adobe Lightroom and CorelDRAW benefit.
Beginner-friendly online free background removal tools
- Canva
- Remove.bg
- GIMP
- Fotor
Most of these tools have AI-powered features and are primarily used for instant and quick edits. In comparison to software, these tools are beginner-friendly and a perfect alternative for DIY edits. Using these tools is comparatively simple and easy.
Professional editing company to outsource background removal service:
Plexail is one of the trusted and reputable photo editing companies. As an experienced photo editing company, we are known for delivering high-quality image output. From simple edits to complex changes, we deliver services to both B2C and B2B. Whether you want us to change the background, edit the colors, or enhance the image, we can deliver all types of image editing services.
Step-By-Step Tutorial to Add a New Background in an Image, Using Photoshop
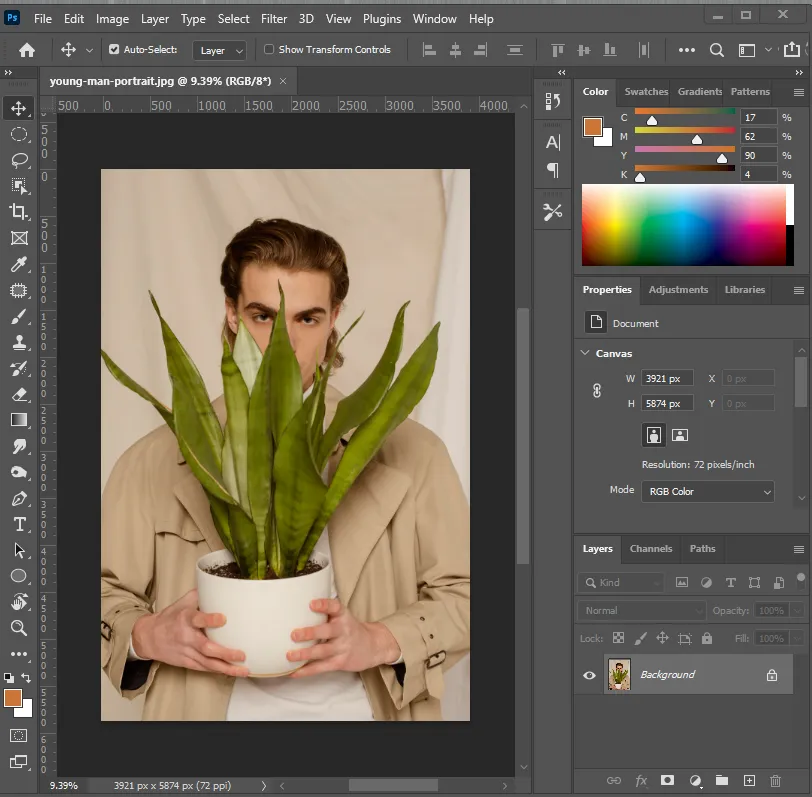
Step 1: Open the image in Photoshop
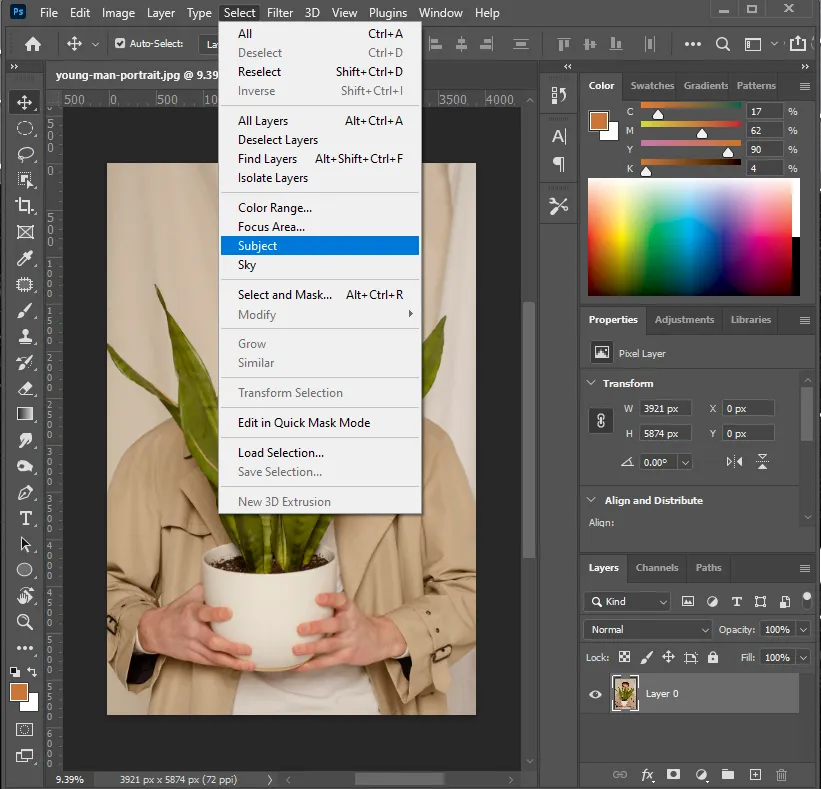
Step 2: Select the subject
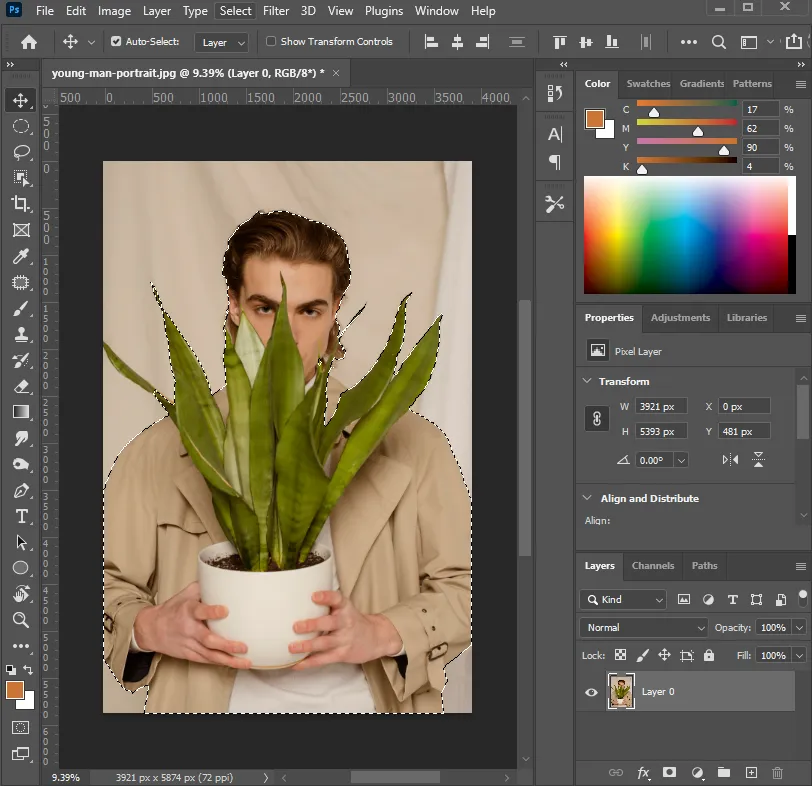
To select the subject, you have multiple options. Either you can manually select the subject using a pen tool or go to select > subject, where Photoshop will automatically select the subject.
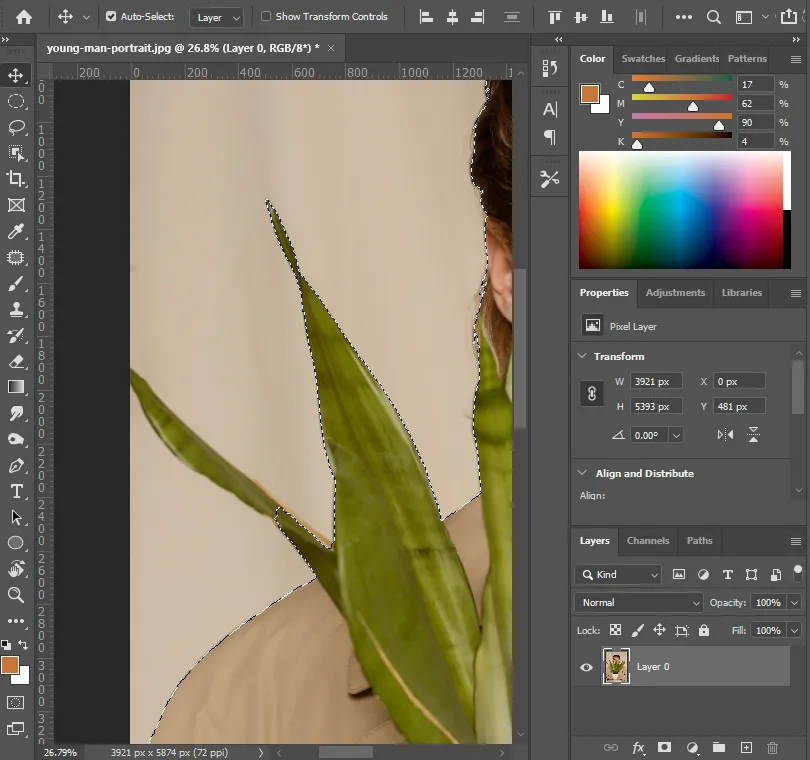
If you feel any part of the subject is left out of the selection, you can use the lasso tool to make an additional selection. Check out these images.

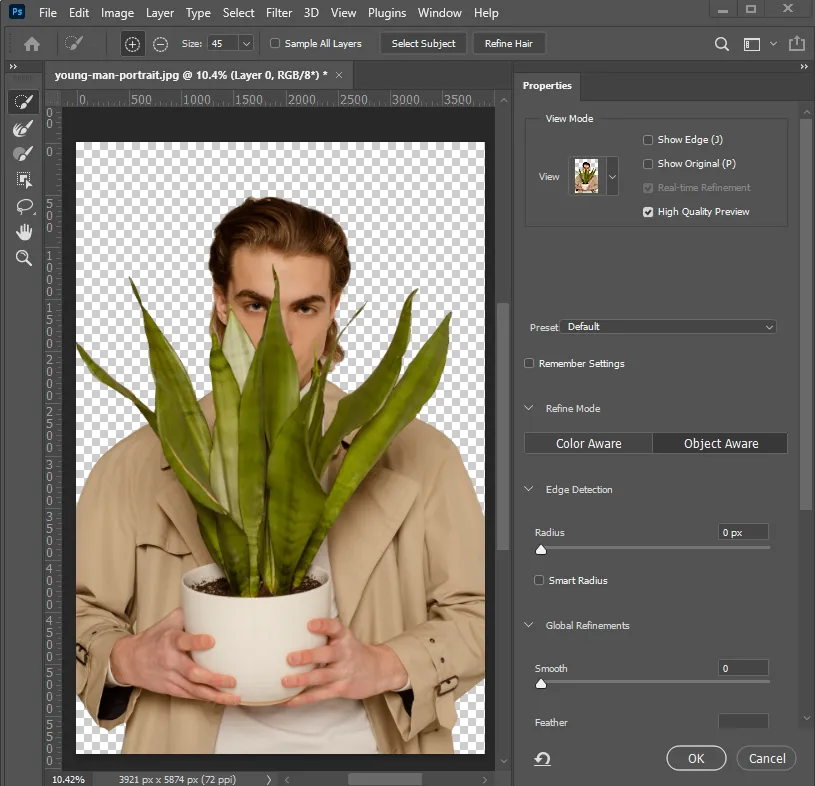
Step 3: You can refine the image using select and mask
Refining the image helps in precise cutouts. It helps improve edit quality, especially when the subject has fur, hair, or feathers. Using this feature, you can correct the rough selections and better edit soft-edged elements in the subject.
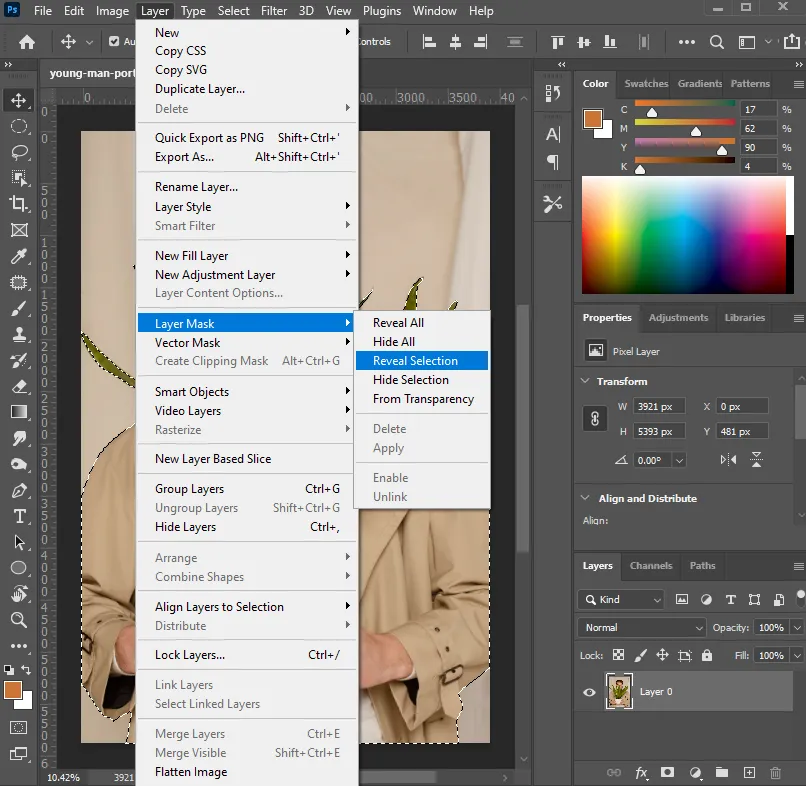
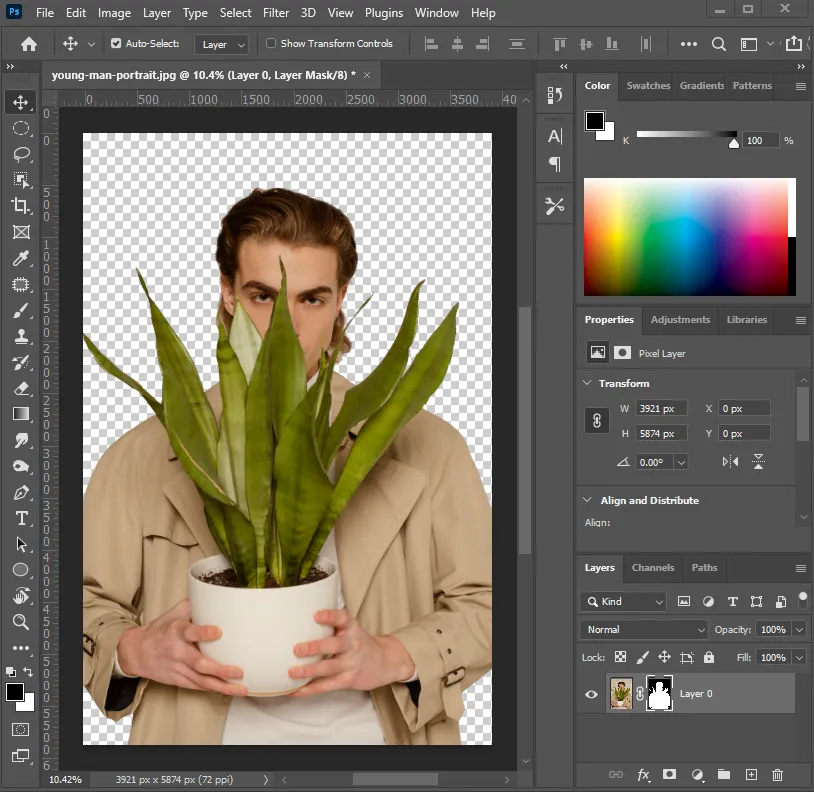
Step 4: Remove the background using a layer mask
Now, using the layer mask option > reveal selection, you can remove the background. However, an alternative step to removing the background is to use the shortcut Ctrl + J (Windows) or Cmd+J (Mac). This shortcut creates a new layer via copy. Here, we have used the layer mask option to remove the background.
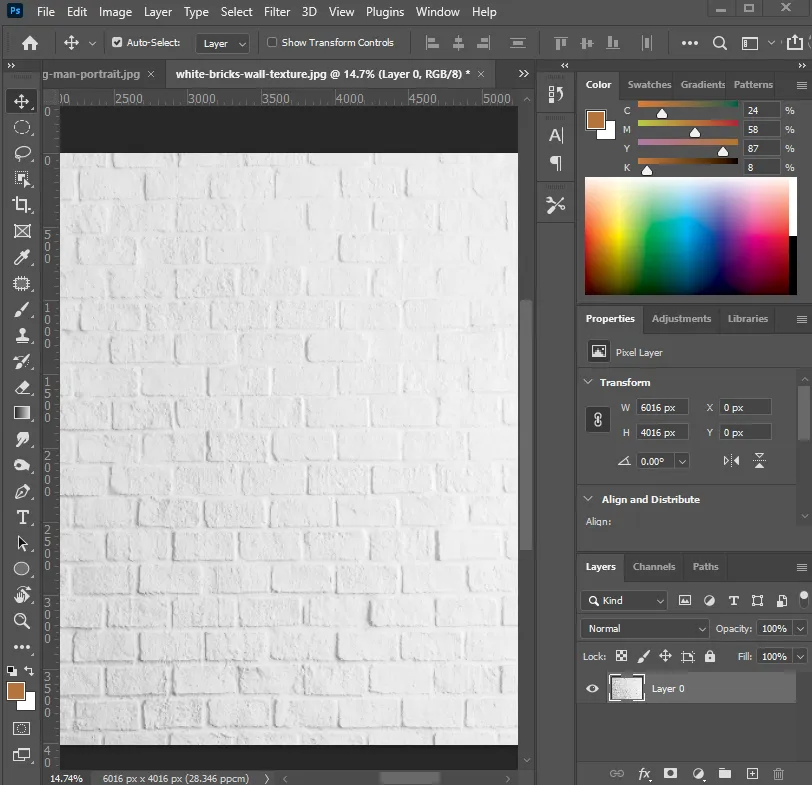
Step 5: Import the new image to add as a background
We have imported a textured white brick image. Place this image below your subject layer, and then it’s done. Later, if you want to make any changes to the colors, you can use the adjustment option: color balance, brightness and contrast, and more. For final touches, you can blur the background, add a vignette, or fine-tune the edges.

So, when you know how to replace the background in Photoshop, it opens up endless creative possibilities. Here are the images showing before and after the edit.


However, an alternative option to remove the background is to use free online tools. They have simple options available to remove the background. But the only drawback of using free online editing tools is that they have limited editing options. You cannot modify the edges or fine-tune the subject much. These limitations often affect the quality of output. So, if you need more control over the edits, using software is a better choice.
Also, if you are a wedding photographer, realtor, designer, jeweler, or have an auction house, you must consider contacting professionals for the service. A professional editing company has the right resources, tools, and an experienced team for the service, saving you time and cost. Contact us at Plexail to hire a background removal and editing service.