Is color grading in Photoshop the same as color correction? No, color grading and color correction are two different types of editing services, used to enhance the image. Beginners often confuse these two services as the same. Color correction is primarily used to correct color imbalances in the image, whereas color balancing is used to make flat-looking images more appealing. Through color grading, creative touch is added to the image to enhance the overall mood. Now, when you have a basic understanding of how color grading is different from color correction, let’s understand in detail what color grading is and how you can do color grading in Photoshop without any prior experience.
Understanding What Color Grading Is?
Color grading is a powerful editing technique that transforms ordinary images into attractive ones. Whether you want to edit portraits, landscapes, or social media content, you must master color grading in Photoshop to create high-end images. In this editing technique, you don’t correct the colors; you play with them. The colors are altered to create a specific mood, tone, or style. In comparison to basic color correction (fixing exposure and white balance), color grading is used to convey your emotions and stories through images in a more artistic way. For instance, using warm tones, you can create a cozy and nostalgic feeling, or you can add high contrast to add drama and intensity.
Why is Photoshop the Most Preferred Tool for Color Grading Services?
Photoshop is widely used for color grading because it offers incredible tools and benefits. Although you have several other image editing tools available online, software like Photoshop stands out for its advanced features and options that you might not find in other tools. From advanced adjustment layers to precise control over the colors, and a non-destructive editing workflow to professional-level tools for photographers and designers, Photoshop offers incredible benefits.
- Photoshop delivers unmatched precision and depth.
- Advanced tools for editing, including channel mixer, selective color, and curves.
- Versatile software that can be used for both color grading and correction throughout.
Why is Preparing an Image Important Before Performing Color Grading in Photoshop?
Preparing an image before color grading is important to get a neutral, consistent, and high-quality start for the service. Preparing includes fixing exposure (the brightness and contrast of the image), adjusting white balance, removing distractions or blemishes, and cropping and straightening the image if needed. By making these adjustments before color grading, you can prevent having to fix the image later and get clean and professional results.
Color grading is a tricky editing technique and requires lot of practice and consistent learning. If you don’t have time to learn this editing technique and are in search of a professional team to outsource the service to, then your search ends here. At Plexail, we provide premium color grading services that meet quality and expectations. And the best part is that all the services are available on time.
Who Can Benefit From Using a Color Grading Service?
Color grading service significantly benefits filmmakers, YouTubers and content creators, businesses, advertisers, marketing agencies, and even wedding photographers and videographers. Irrespective of the business vertical you are in, if you use an image editing service in your business, you can benefit from a color grading service to enhance images and output. At Plexail, we have delivered color grading in Photoshop services to, not limited to, production houses and editors, corporate content creators, and several e-commerce businesses.
How to Do Color Grading in Photoshop?
Here is a beginner’s guide to understanding how to do color grading in Photoshop.
Step 1: Open and select the image you want to edit.
To open the image, go to File and select the Open option. Select the image you want to edit. Make sure you select a quality image for better results.

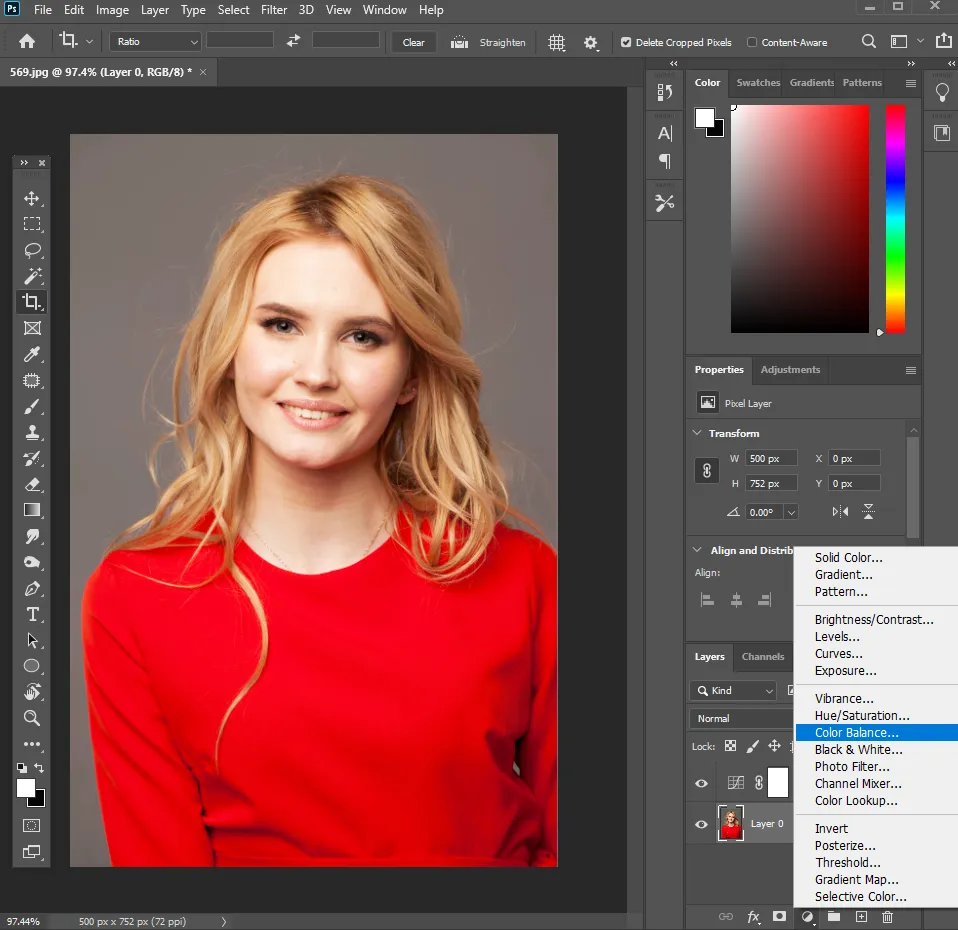
Step 2: Use adjustment layers to edit
Instead of editing directly on the image, always use adjustment layers. Click the Adjustment Layer icon (half-filled circle at the bottom of the Layers panel). You can check teh reference image to locate the icon in the layer panel. From the given options, you can choose Curves, Color Balance, Hue/Saturation, and more. The benefit of using an adjustment layer is that it allows you to edit the image without affecting the original photo.

Likewise, you can try to use other options in the adjustment layer.
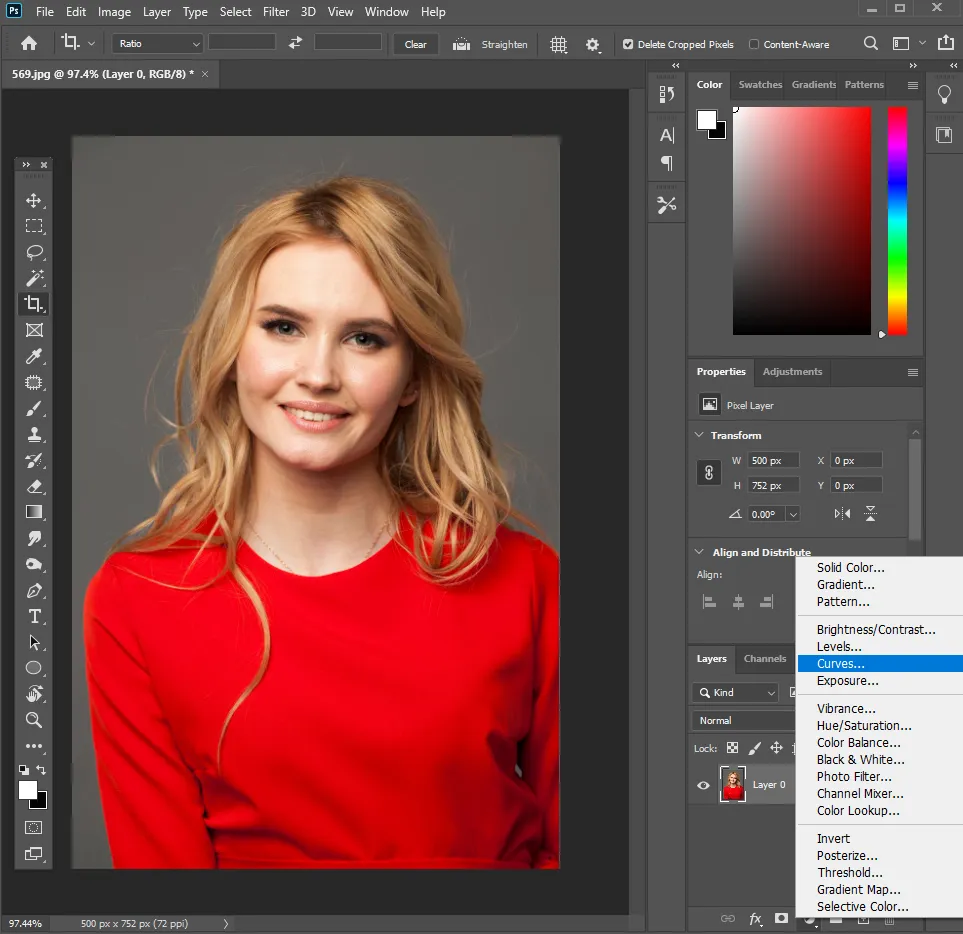
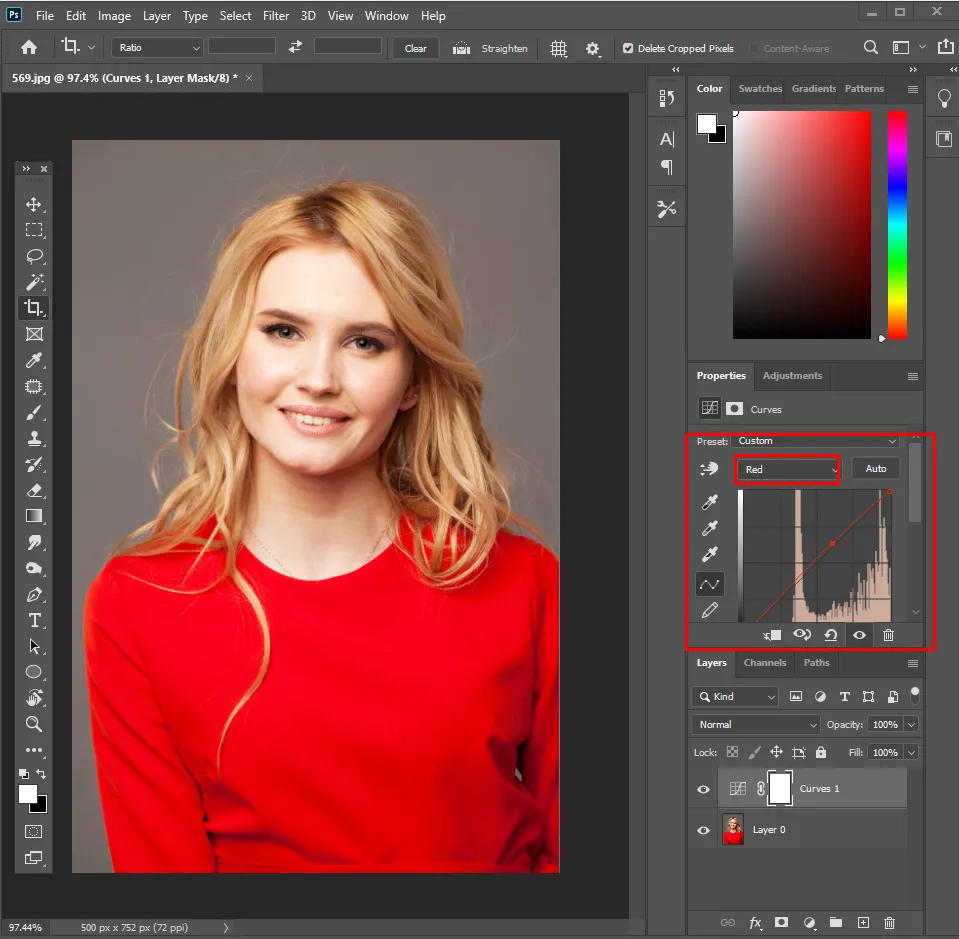
Step 3: Use curves to adjust brightness and contrast.
The Curves tool is essential for color grading. Go to Adjustment Layer > Curves
Create a subtle S-curve: Drag shadows slightly down, lift highlights slightly up. This adds contrast and depth to your image. You can also adjust individual color channels: Red channel adds warm tones, Blue channel adds cool tones, Green channel balances color
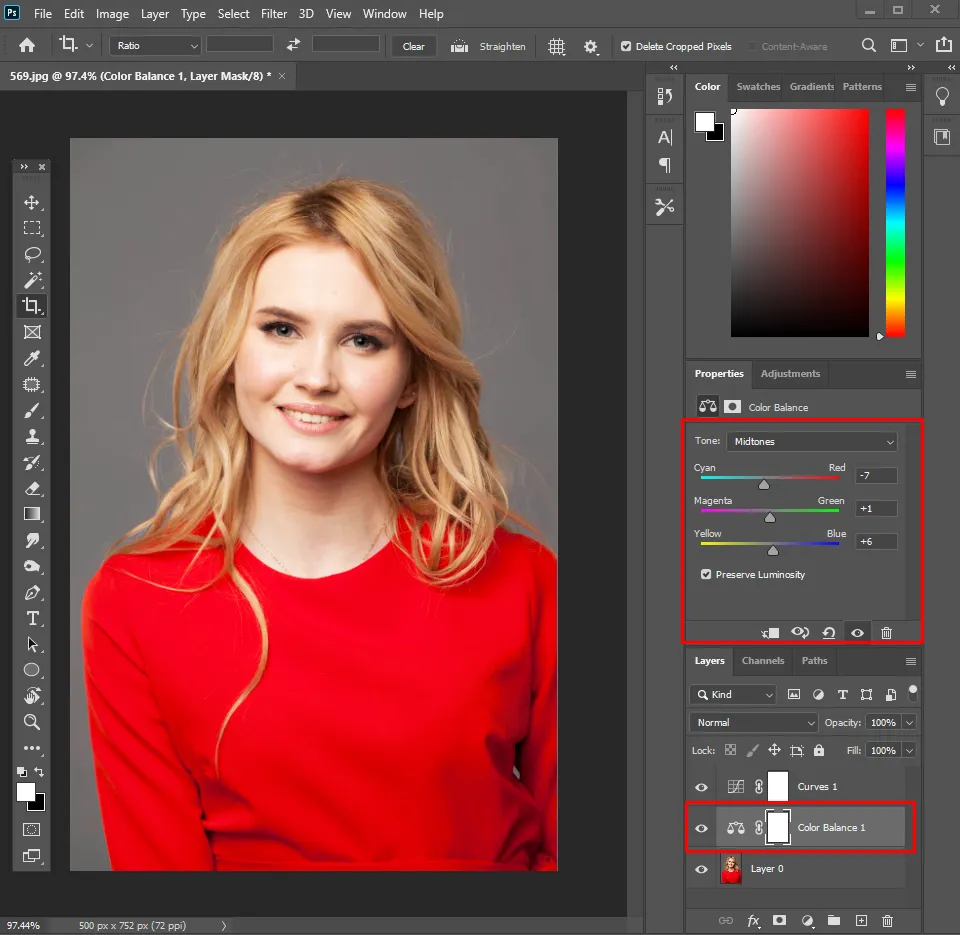
Step 4: To add cinematic colors, you can use color balance.
Now comes the fun part, adding mood. Go to Adjustment Layer > Color Balance. Adjust three tone ranges: Shadows, Midtones, Highlights.
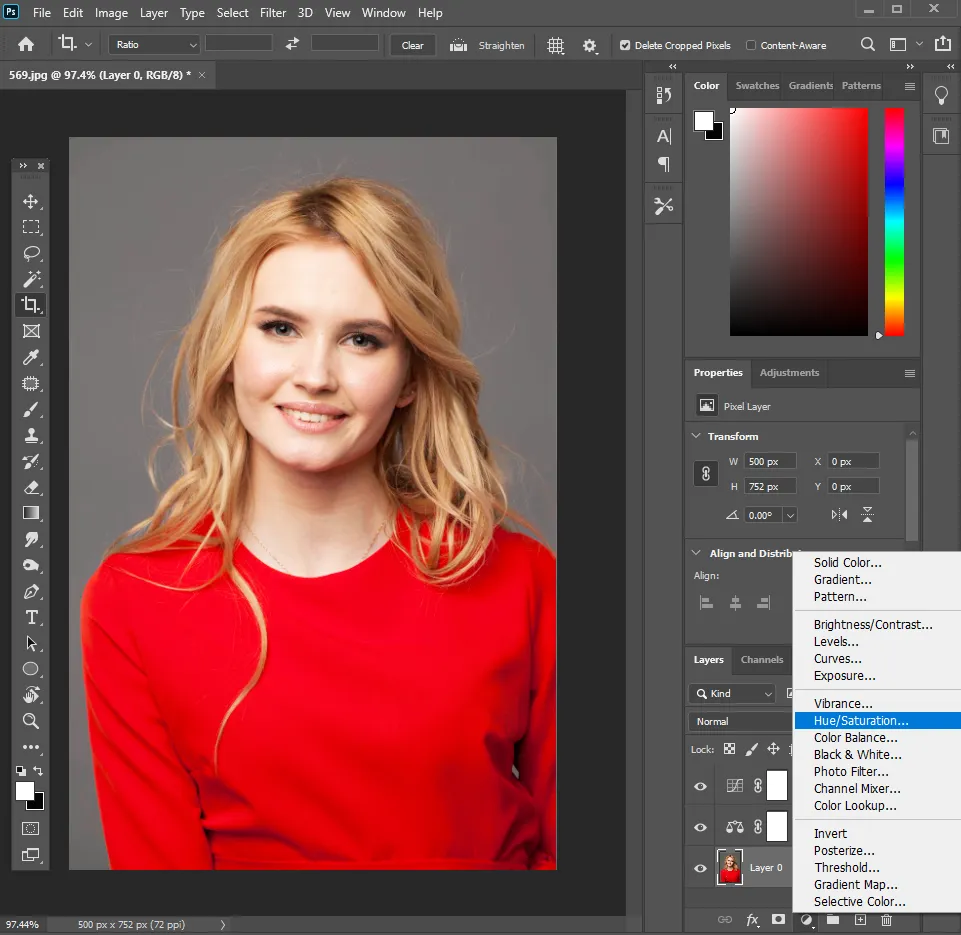
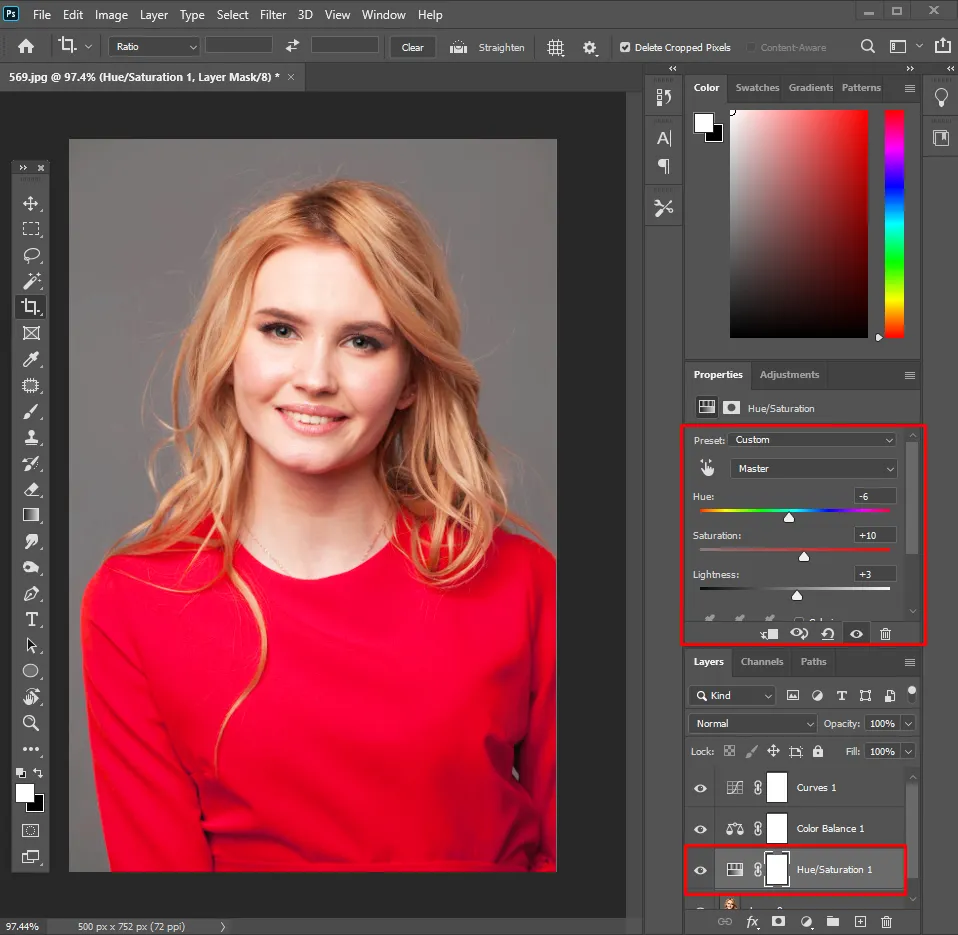
Step 5: You can enhance colors using Hue/Saturation
Go to Adjustment Layer > Hue/Saturation. Adjust hue to shift colors creatively. Make sure you don’t over-saturate, as it can make your image look unnatural.
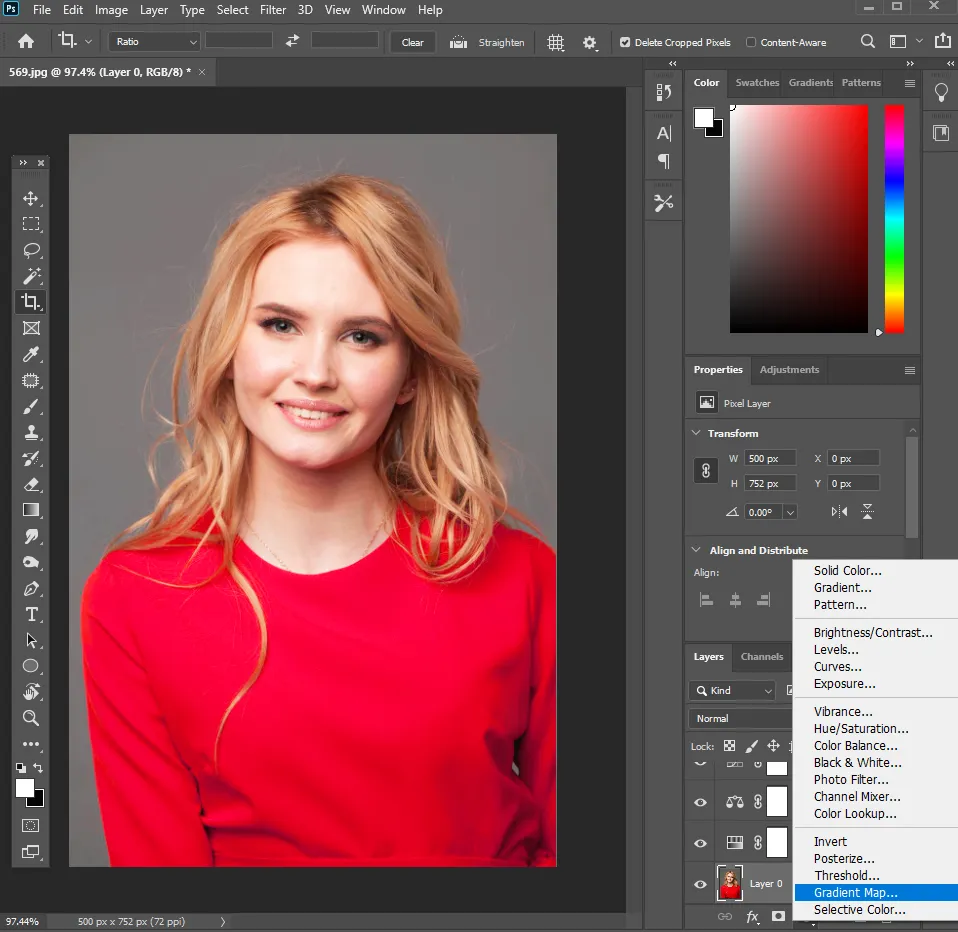
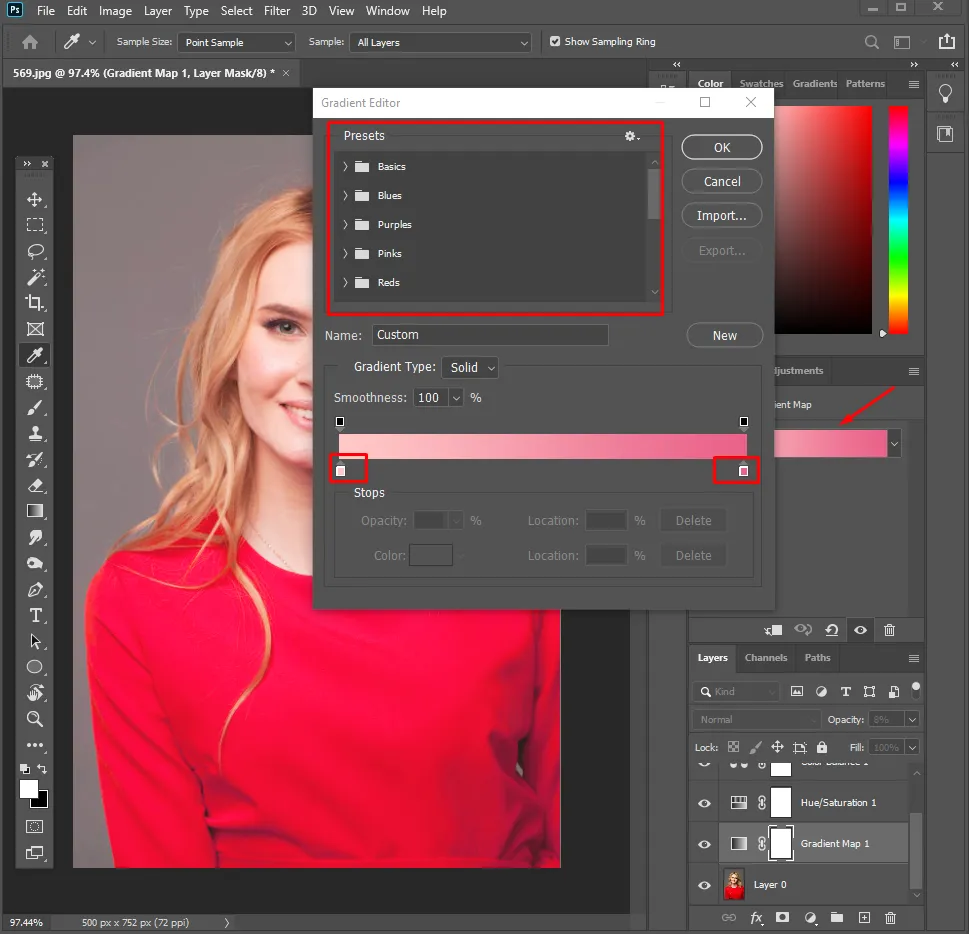
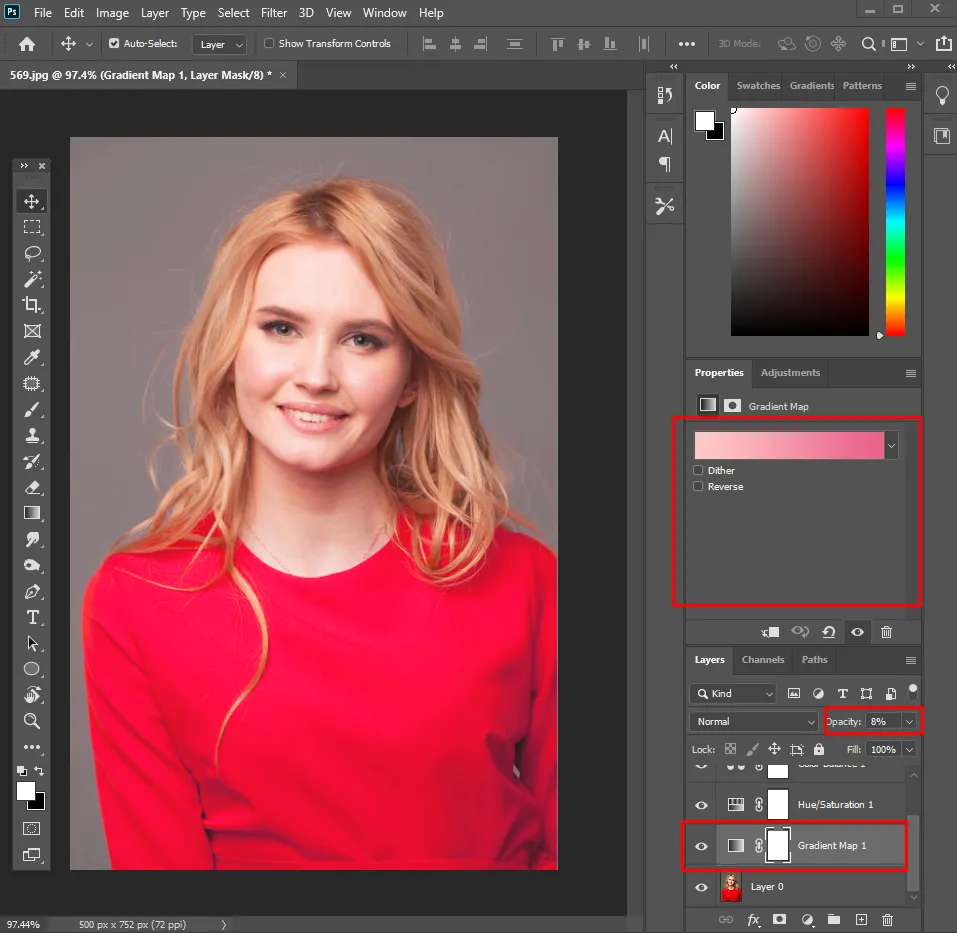
Step 6: Gradient map for color grading
Gradient Maps is a tool used for advanced editing. Go to Adjustment Layer > Gradient Map. Choose a gradient, and even create a custom gradient. Reduce opacity for a subtle effect. This technique is used to add a professional tone to the image.
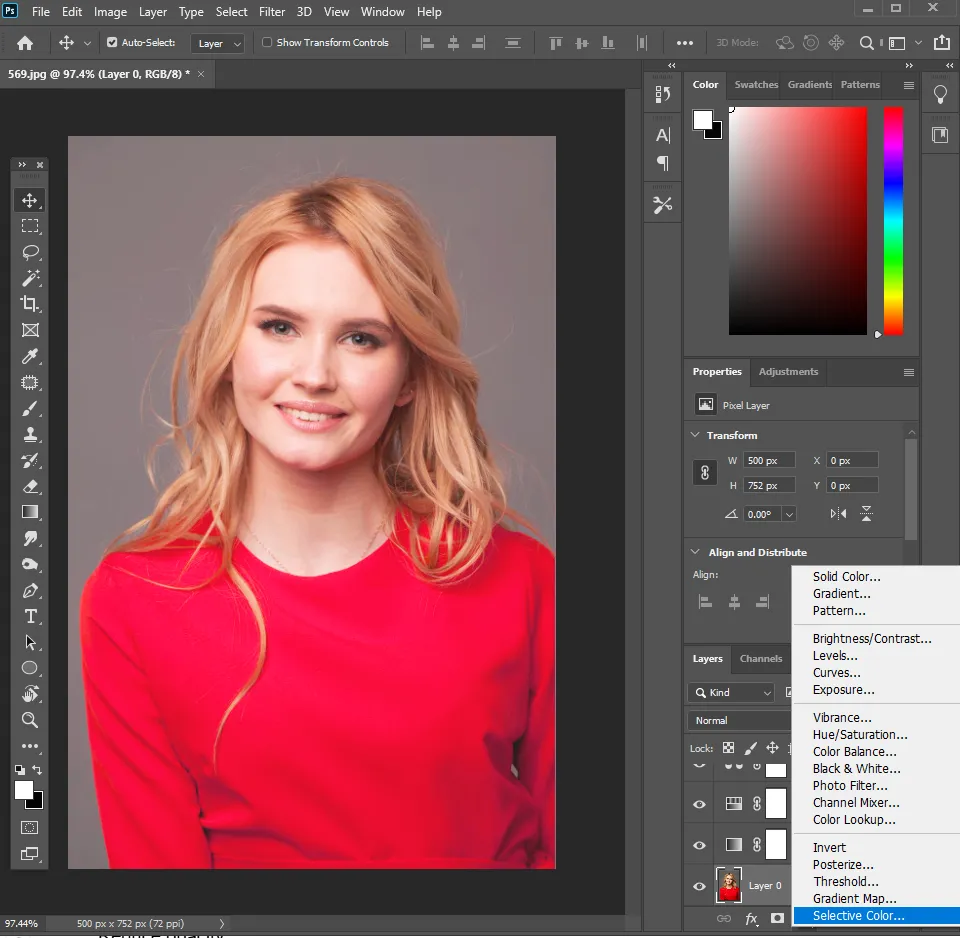
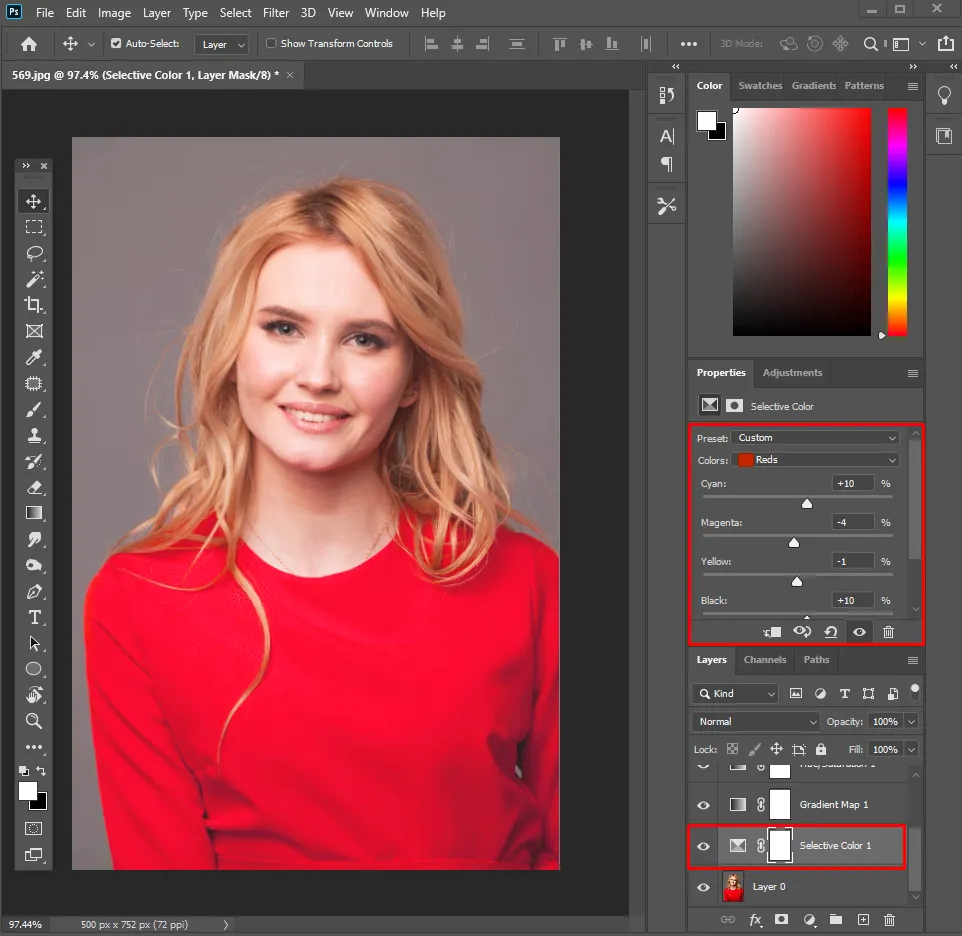
Step 7: Fine-Tune with selective color
Selective Color lets you tweak individual colors precisely. Go to Adjustment Layer > Selective Color. Choose a color (e.g., Reds). Adjust Cyan, Magenta, Yellow, and Black levels
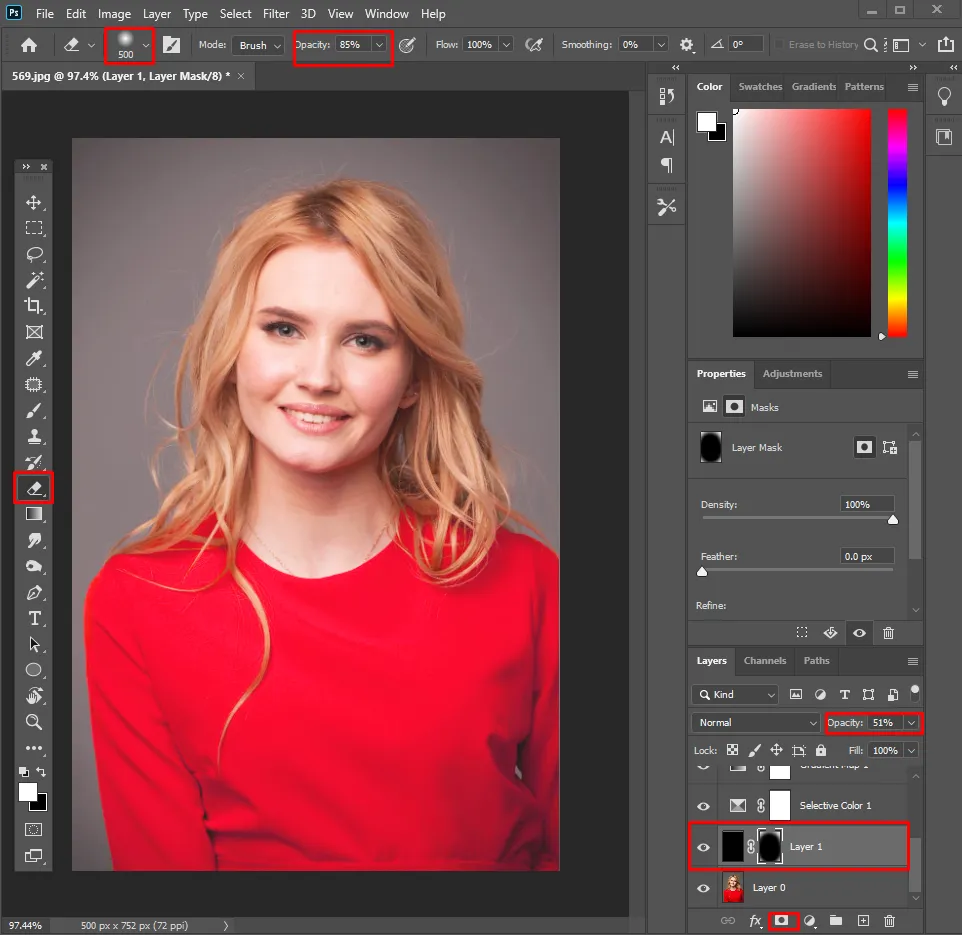
Step 8: Add a vignette to bring the subject into highlight
Using this tool, you can draw attention to your subject. Create a new layer, fill with black, select the masks tool, and then create a large soft mask around the center, using the eraser tool. Also, reduce the opacity. The alternative to this option is to use camera raw filter > effects > vignette.

Step 9: Time for final adjustments and export
Now, you can check if there are any other final adjustments that you want to make. Once you have completed it, it’s time to export the image. To export the image, go to file, select export, then export as. Select the format in which you want to export the image.
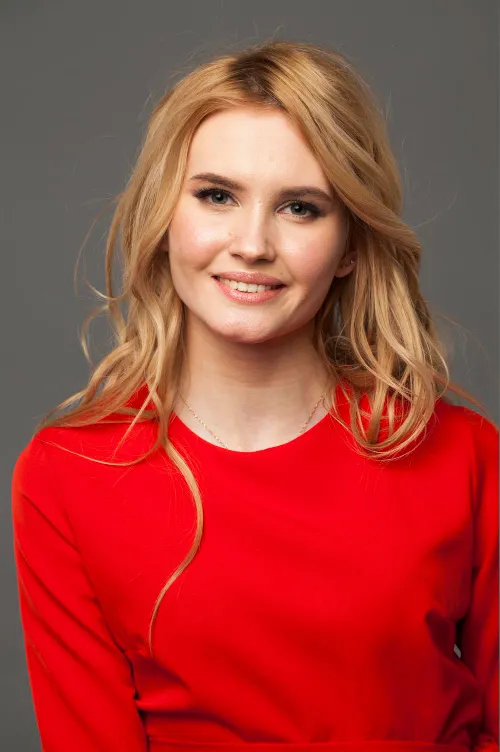
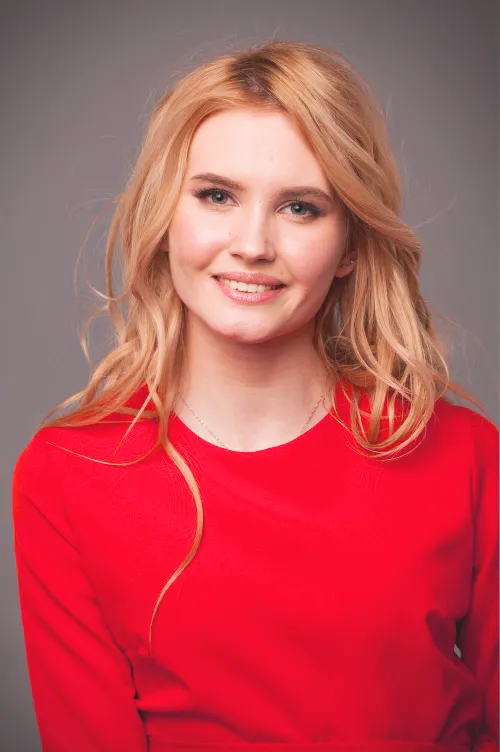
Check the difference between the image before and after editing:
If you also want to transform ordinary images into professional-looking visuals, then contact our team at Plexail. We have a team of experienced editors for the service. Contact today.