Key Takeaways
- Match the method to the background. Solid color, soft gradient, or blur? Clone and patch is quick. Textured or detailed? Rebuild it by hand.
- Work on a copy, and patch from nearby. Duplicate the photo on top first, then borrow your patch from right beside the text so the light and color line up.
- Soften the edges and add a little grain. Hard edges and overly smooth patches are what give an edit away.
- Check at 200% zoom, then step back to 100%. If you can’t spot the patch at normal size, you’re done.
- Know when to switch. If the text sits over a face or a busy scene, Photoshop or a cleaner image will save you time.
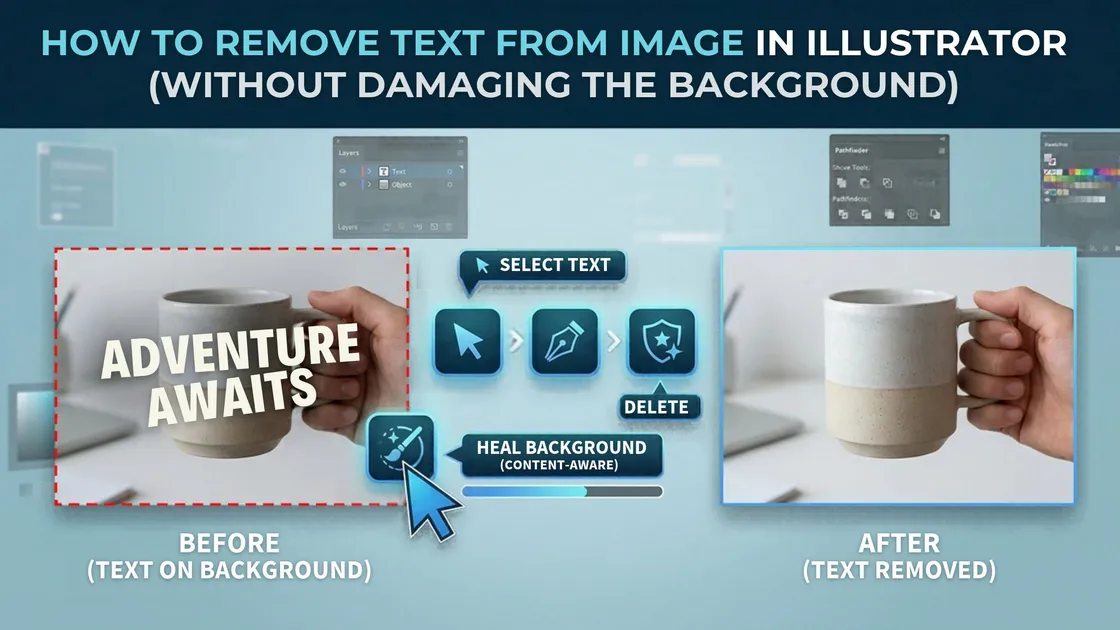
You can remove text from image on Illustrator by rebuilding the background underneath it, not just wiping out the letters. Cover the text with a matching piece of the image, then blend the edges until the join disappears.
One distinction first. This guide is about text printed on a photo, such as a label, caption, or watermark. If the text is a live, editable object sitting on top of your image, select it and press Delete. If the text is part of a flat vector shape, you would edit the shape instead.
Also, Illustrator is built for vector artwork, not photo retouching. It has no true Content-Aware Fill. If your image has a complex background, such as faces, foliage, or brick walls, Photoshop will save you time. But if you are already working in Illustrator and the background is fairly simple, the two methods below work well. They leave no visible patch when done properly.
Why Simply Deleting the Text Isn’t Enough
Text in a photo is part of the image, not a separate layer. It’s made of pixels, just like everything else, because photos are raster images (here is how vector and raster images differ). Deleting those pixels leaves a hole with no color, grain, or lighting behind it.
Fill the gap with flat color, and the eye catches it right away. The patch looks too smooth, too dark, or too bright next to the surrounding pixels.
This matters most in:
- Product photography: a stray label or tag on a clean product shot looks unprofessional.
- Signage: removing a shop name from a street photo for a mockup.
- Real-estate listings: agency watermarks across the corners of a room photo.
A clean removal needs three things to match the surroundings: color, lighting, and texture. If any of these is missed, the patch will show.
How to Remove Text From a Photo in Illustrator: 2 Methods
Method 1: Clone and Patch Over the Text
Illustrator has no Clone Stamp, but you can get the same results with a clipping mask. This method suits simple, low-detail backgrounds like solid colors, soft gradients, or blurred areas.
- Place your photo on the artboard and keep it embedded (not linked).
- Duplicate the image: select it, then press Ctrl+C and Ctrl+F (Cmd+C and Cmd+F on Mac) to paste a copy directly on top.
- Draw a shape with the Rectangle or Ellipse tool over a clean area right next to the text. Make it slightly larger than the text itself.
- Make a clipping mask: select the top copy and the shape, then go to Object > Clipping Mask > Make. Only the clean patch remains visible.
- Place the patch over the text and nudge it into position until the background flows through without a break.
- Feather the edges (Effect > Stylize > Feather) at around 5 to 10 px, so the patch fades into the photo.
- Fine-tune the position. Nudge with the arrow keys until lines, gradients, and light line up.
Pick a patch source in the same lighting as the text area. If the background gets darker toward one side, sample from the same side.
Method 2: Rebuild the Background Manually
When the surface has structure, a copied patch tends to repeat or clash. Redraw instead.
- Sample the color. Press I to pick up the Eyedropper, then click the area right beside the text to grab its color.
- Cover the gap with a shape. Use the Rectangle tool when the edges are straight, and the Pen tool when they’re not.
- Match gradients. Use the Gradient tool (G) with colors sampled from both edges of the gap. For curved or uneven light, try a Gradient Mesh (U).
- Add texture. Apply Effect > Texture > Grain or a light Gaussian Blur so the rebuilt area matches the photo’s softness.
- Blend the edges with Feather or a slightly reduced opacity.
Is it worth the effort? Manual rebuilding makes sense for small areas on flat or gently shaded backgrounds. If the text crosses faces, patterns, or sharp architectural lines, you’ll spend more time fixing than the result is worth. In that case, re-source the original image, re-shoot, or use Photoshop’s Content-Aware Fill.
Which Method Should You Use?
| Method 1: Clone and Patch | Method 2: Manual Rebuilding | |
|---|---|---|
| Best for | Solid, gradient, or blurred background | Textured or detailed background |
| Time needed | Quick: 5 to 10 minutes | Slower: 10 to 15 minutes |
| Skill level | Beginner | Intermediate |
| Risk | Repeated patterns can look obvious | Smooth shapes can look fake without grain |

Checking Your Work
Patches show up first under zoom. Before exporting:
- Zoom to 200% or more and scan the edges of the patch.
- Look for repeated textures, lines, or color shifts.
- Toggle your view between Outline and Preview, or check on different screens, since brightness can hide the patch.
- Step back to 100%. If you can’t find the edit at normal size, you’re done.
Need Spotless Results Without Hassle?
Patching by hand takes patience, and one visible edge can undo the whole edit. If you’d rather hand it off, Plexail’s professional team can remove text, watermarks, and unwanted marks from your photos as part of its photo editing services and photo retouching services, with the background rebuilt so the edit doesn’t show.
Send your image to Plexail today at info@plexail.com and get clean, natural-looking results, ready to use. You can also call +91 9819259097 for details.