Key Takeaways
- You can create multiple versions of the same product using Adobe Photoshop.
- Use the Hue/Saturation adjustment layer for solid-colored clothing and the Selective Color feature for patterned clothing.
- By using selections and adjustment layers, you can keep your original image untouched and make editing simpler in the future.
- Preserving the texture, natural creases, highlights, and shadows of a fabric will help create a realistic color change.
- Ecommerce sellers can create additional images for their product listings without taking multiple photographs.
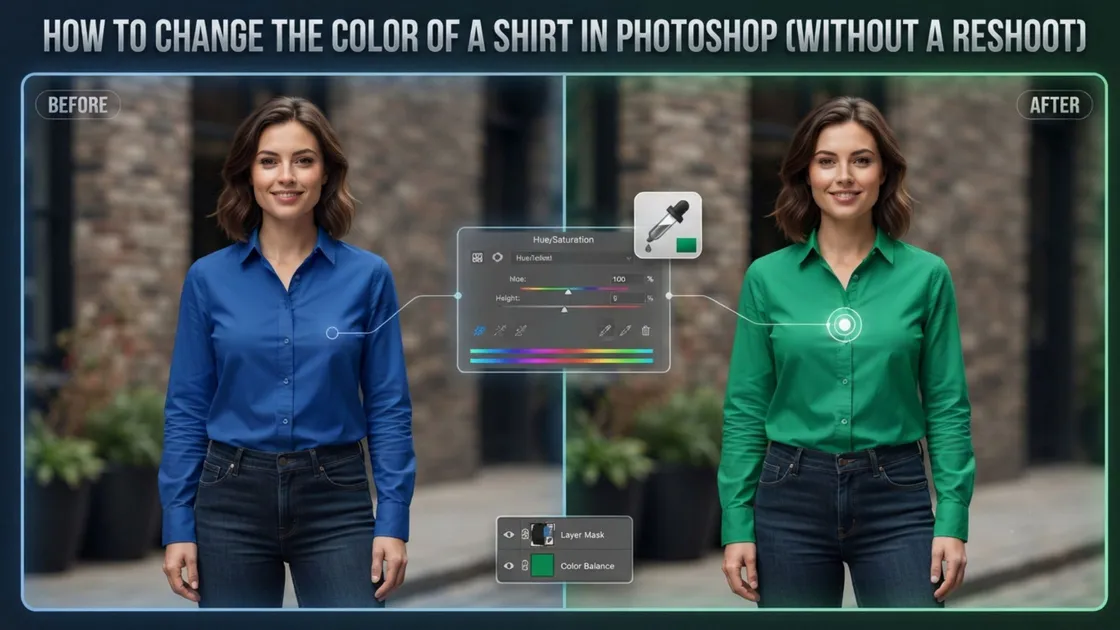
To change the color of a shirt in Photoshop, select the shirt, add a Hue/Saturation adjustment layer and move the Hue slider until you reach the color you want. Plain fabric takes a few minutes, while patterned fabric needs a Selective Color adjustment instead. The same steps work for dresses, jackets and other clothing.
Assume you are the owner of an online clothing store. You have just taken some product photographs for a new shirt that you are selling. However, there are five different colors of this design. Do you need to have another photo session? The answer is no.
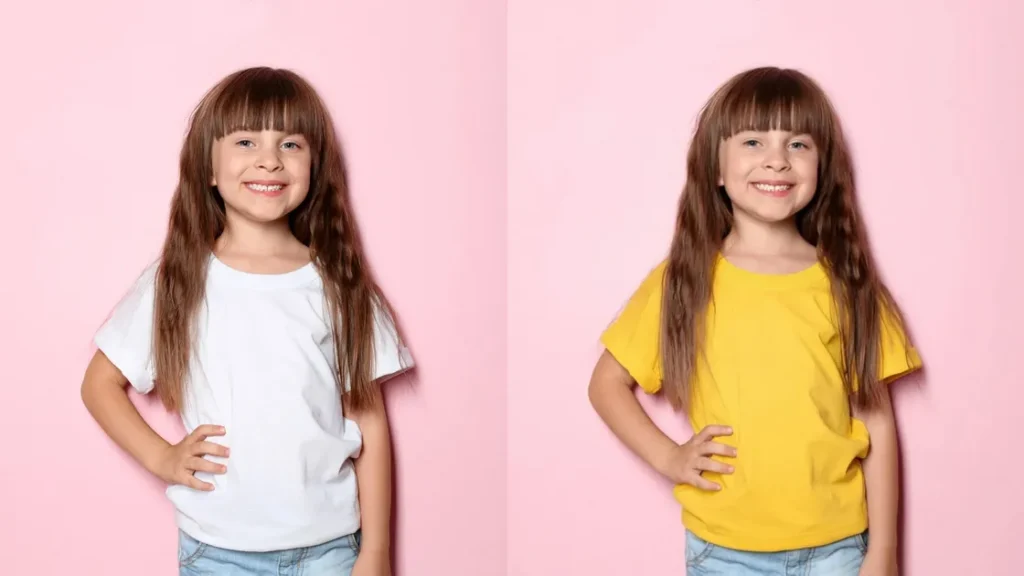
Using Adobe Photoshop, you can easily change the color of an item of clothing while maintaining the details of the fabric. Using the correct selections and adjustments, you can create a variety of different product images from just one photograph.
If you have ever wanted to know how to recolor a shirt in Photoshop, the process is quite simple. The steps below walk you through it, from selecting the garment to saving every color variation.
Step 1: Select Just the Garment
This should be done carefully to achieve a clean result. Take your time and pay close attention to the garment’s edges.
- Open your image and go to Select > Subject. This will automatically select the main subject of the image.
- Select the Quick Selection Tool and hold down Alt (Option on Mac) while clicking on the areas of skin, hair, and background that you want to exclude.
- Switch to the Lasso Tool to clean up any areas around the straps, cuffs, collar, and buttonholes.
- Go to Select and Mask and soften the edge of the selection by 1 or 2 pixels to remove any bright outlines along the fabric.
Step 2: Change the Color With a Non-Destructive Adjustment Layer
Non-destructive editing means you are not changing your original image, so you can change your mind whenever you like.How to Change Clothing Color Using Hue/Saturation
- While your garment is still selected, open the Adjustments panel and click on Hue/Saturation. Photoshop will create a mask based on your selection, so only your garment will be affected.
- Move the Hue slider to get your desired color.
- Fine-tune the color by adjusting Saturation (how vibrant it is) and Lightness (how bright it is).
- Rename your layer to the color you have chosen, such as Olive. This will keep your variations organized.
How to Change White, Black, or Gray Clothing
If you are changing white, black, or gray items, there may not be enough existing color information to adjust using the Hue slider alone.
Tick the Colorize box in the same panel, or add a Solid Color Fill layer while your selection is still active and change its blend mode to Color.
Step 3: Handle Patterned or Textured Fabric
If you are dealing with plain fabric, the task is fairly straightforward. However, when working with patterned fabrics such as floral prints, stripes, checks, and textured materials, you may encounter some issues.
You don’t want to completely change the pattern into a solid color. Instead, you want to change the fabric’s base color while preserving its original pattern.
How to Change Patterned Fabric Using Selective Color
The Selective Color adjustment layer works well for this type of edit.
- Select your garment using any of the methods mentioned above.
- Add a New Adjustment Layer and choose Selective Color.
- Choose your color range from the drop-down menu.
- Adjust the Cyan, Magenta, Yellow, and Black sliders.
- Check your changes to ensure the original patterns and fabric details remain visible.
Use Color Balance for Additional Color Adjustments
You can also experiment with Color Balance if you want to change the overall tone.
The best method will depend on your original photo. For example, if you are changing a red floral dress to a blue dress, you may need to make multiple adjustments to both the flowers and the background fabric.
Remember to be careful with how much you adjust. Small changes usually look more realistic.
Keeping Shadows and Texture Realistic
This is the part where your product image will really come to life instead of looking obviously edited.
- Use adjustment layers: You have already preserved most of the highlights and shadows using Hue/Saturation and Selective Color.
- Use the correct blend mode: Ensure your fill layers use the Color blend mode rather than Normal when you want to preserve the original fabric’s texture and shading.
- Check dark creases: Look at the darkest folds in your image. If they appear too muddy, reduce the Saturation slightly or lower your adjustment layer’s Opacity by a few percent.
- Compare with the original: Toggle the visibility icon on and off to check your edits against the original image.
Why Changing Clothing Color Matters for Ecommerce Sellers
You can create multiple color variations from a single photoshoot. This can save you considerable time and money.
Instead of creating samples, hiring models, spending hours in a studio, and editing multiple photographs, you can recolor your images using one set of product photos. For larger catalogs, ecommerce photo editing services can handle the same job at volume.
This can reduce photography costs per SKU without compromising quality. You will also maintain consistency in lighting and styling, making your product pages look more professional. New color variations can be added as soon as your stock arrives.
A Quick Note: Always Check the Actual Fabric Color
Always compare your edited image against a physical sample to ensure your customers get an accurate representation of the product’s color. If your edited shades still look off on screen, photo color correction services can help match them to the real product.
Get Professional Help With Clothing Color Changes
Learning how to change the color of a shirt in Photoshop comes down to a few habits: select the garment cleanly, work with adjustment layers, and check every color against the real fabric.
Have a whole catalog of colorways to produce? The team at Plexail offers professional photo editing services and fashion photo editing services, so every color variant looks clean, consistent and true to the product. Get in touch with Plexail today. Call +91 9819259097 or email us at info@plexail.com.
Frequently Asked Questions (FAQs)
Can I change clothing color in Photoshop without losing texture?
What is the fastest way to create color variants of a product photo?
Does this method work on patterned fabric, not just solid colors?
Yes. By using Selective Color or Color Balance, you can change the base color while preserving the other colors in the print. If the pattern is very detailed, you may need to spend more time refining your mask, and professional image masking services can save time on complex prints.