Key Takeaways
- Increasing resolution adds pixels. It doesn’t automatically add real detail.
- Careful upscaling, noise reduction, and selective sharpening can make a photo look clearer.
- Image Size with Preserve Details 2.0 is a good fit for controlled enlargement.
- Super Resolution often works better for large prints and tight crops.
- A screenshot or heavily compressed social media image is usually better replaced with the original file.
- For print, the pixel dimensions matter. Changing the PPI value alone creates no extra detail.
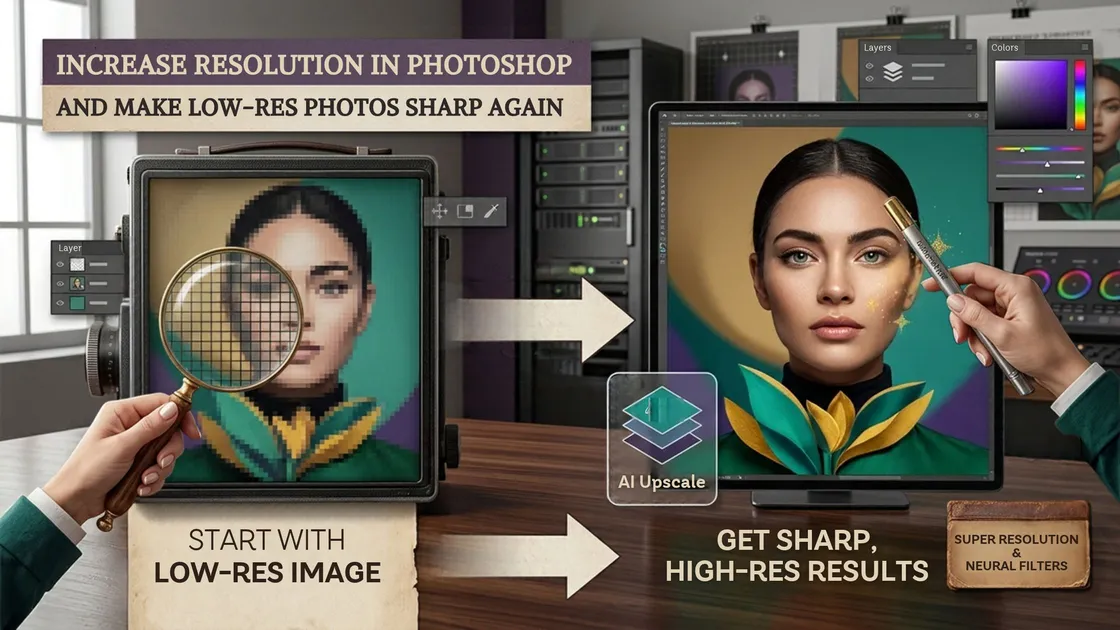
To increase resolution in Photoshop, go to Image > Image Size, tick Resample, choose Preserve Details 2.0, and enlarge in small steps. For tight crops or large prints, try Super Resolution in Camera Raw, then reduce noise and sharpen only where needed.
A small, blurry photo can often still be put to good use. With the right approach, you can make it larger, cleaner, and far more usable, but it helps to know the limits before you open Photoshop. It can enlarge an image, soften pixelation, reduce noise, and tidy up rough edges. It can’t bring back detail the camera never recorded.
This guide explains how to increase resolution in Photoshop using both the classic Image Size method and the AI-based Super Resolution feature. You’ll also learn when sharpening helps, when it makes a photo look worse, and when asking for the original file is the smarter choice.
Understanding Image Resolution and Sharpness
Making an image bigger and making it look sharper are two separate jobs. The first means adding pixels through resampling. The second reduces noise, improves contrast, and sharpens edges so the photo looks clearer to the eye.
You’ll usually need this when a client sends a photo that’s too small for print, when an old scanned photograph needs enlarging, or when a screenshot is the only source image available. Photoshop offers several practical options for each case. The trick is matching the method to your particular photo.
What Increasing Resolution Can and Can’t Fix
Photoshop can make a small image larger and make pixelation less noticeable. But every added pixel is an estimate, not a recovered detail.| Photoshop can help with | Photoshop can't fully fix |
|---|---|
| Small images that need enlarging | Extreme blur |
| Mild pixelation and soft edges | Photos that are completely out of focus |
| Noise, grain, and compression artifacts | Detail missing from a low-quality screenshot |
| Print size and resolution settings | Extra detail from changing the PPI value alone |
| Mild camera shake | Severe motion blur |
Here's a simple example. If a photo is 500 pixels wide, Photoshop can create a 2,000-pixel version, but it has to guess the new pixels. The result will look smoother and more usable, though it won't turn into a genuinely high-resolution photograph.
How to Increase Resolution in Photoshop: 2 Methods
Method 1: Enlarge the Image Manually With Smart Resampling
This is the most straightforward way to enlarge a photo, and a dependable answer to how to increase resolution of image in Photoshop. You control the final dimensions and choose how Photoshop builds the new pixels.
- Open your image and press Ctrl/Cmd + J to duplicate the background layer.
- Go to Image > Image Size.
- Keep the chain icon active so the proportions stay the same.
- Tick Resample.
- Choose Preserve Details 2.0 from the dropdown.
- Increase the size in small stages, such as 110% to 150%, instead of one big jump.
- Use the Reduce Noise slider if grain becomes more visible.
- Click OK and inspect the result at 100% zoom.
If Resample is switched off, Photoshop only changes the print size and density. It doesn’t add any pixels.
For a photo that’s only slightly small, start with a 150% enlargement. Check the eyes, hair, product edges, and text. If it still looks clean, enlarge again in a separate step rather than forcing a 400% increase at once.
Method 2: Photoshop’s AI Super Resolution
For many photos, Super Resolution gives a cleaner enlargement than resizing by hand. It’s available in Adobe Camera Raw (not in Photoshop’s Camera Raw Filter) and uses AI to rebuild fine detail.
- Open the photo in Camera Raw. For a JPEG or TIFF, go to File > Open. If it opens in Photoshop instead, go to Edit > Preferences > Camera Raw > File Handling (on Mac: Photoshop > Settings) and set Camera Raw to open supported JPEGs and TIFFs automatically.
- Open the Detail section in the Edit panel and select Super Resolution. In older versions, right-click the image and choose Enhance instead.
- Check the preview, then click Enhance.
- When the new file is ready, fine-tune sharpening, noise reduction, and texture.
It works especially well when you need to crop in tightly, print larger, or bring out more detail in an older photograph. It isn’t magic, but it usually looks more natural than repeatedly enlarging a compressed JPEG.
There are trade-offs. Super Resolution doubles the width and height, so the new file has four times the pixels, and it can only be applied once to an image. AI upscaling also takes longer than a basic resize, especially on large files or batches. For one important photo, that’s worth it. For hundreds of web images, the Image Size method is often faster.
How to Improve Photo Quality in Photoshop After Enlarging
Once the image is larger, the goal is to make it cleaner and sharper without overdoing it.
Reduce Noise First
Low-resolution photos often carry grain, color noise, or compression artifacts, and sharpening exaggerates them. Use Filter > Noise > Reduce Noise or the Noise Reduction controls in Camera Raw. Keep it moderate, because too much makes skin and fabric look plastic. Our guide on how to reduce noise in Photoshop covers this in more detail.
Sharpen Selectively
For how to improve photo quality on Photoshop, targeted sharpening usually beats sharpening the whole image.
- Duplicate the layer.
- Go to Filter > Sharpen > Unsharp Mask.
- Start with an amount of 40% to 80%.
- Set the radius low, somewhere around 0.5 to 1.5 pixels.
- Add a layer mask and paint only over areas that need it, such as eyes, hair, edges, or text.
This keeps smooth areas like skies and skin from looking rough.
Use Texture and Clarity Sparingly
Both sliders make fine details stand out, but too much creates halos around edges. Make small adjustments and zoom in before saving.
When to Ask for the Original File Instead
Sometimes the best decision is to skip upscaling altogether. If the source is a screenshot, a photo forwarded on WhatsApp, or a heavily compressed JPEG, no amount of editing will match a proper export from the original.
Ask the client or photographer for:
- The original RAW, JPEG, or TIFF file
- A version taken straight from the camera, phone, or cloud storage
- A file that hasn’t been resized, filtered, or shared repeatedly through messaging apps
- A reshoot, if the image is essential for a large print or premium product page
A screenshot may be fine for a small web placement, but it rarely holds up in print. If you are unsure which file to request, our guide to the highest quality image format for print and web explains the options. One quick request for the original can save you hours.
Get Professional Photo Editing Support
Need a low-resolution photo ready for print, e-commerce, social media, or restoration? Plexail offers photo editing services and photo retouching services, including resizing and enhancement, built around your project. Call +91 9819259097 or email info@plexail.com to get started.
Frequently Asked Questions (FAQs)
How to increase resolution of image in Photoshop without losing quality?
What's the best DPI to use for print?
For most photo prints, 300 PPI is a common target. The right value still depends on print size, viewing distance, and the printer. Changing PPI alone doesn’t add pixels or improve sharpness. You can read more about DPI in image files in our practical guide.