Key Takeaways
- A clipping path gives the cleanest background removal for hard-edged subjects.
- The Pen tool traces the subject precisely, and slight feathering keeps edges smooth.
- Turn the path into a selection, then copy the subject onto a new layer.
- For hair, fur, and soft edges, masking is better. Use clipping paths for defined edges.
When to Use a Clipping Path
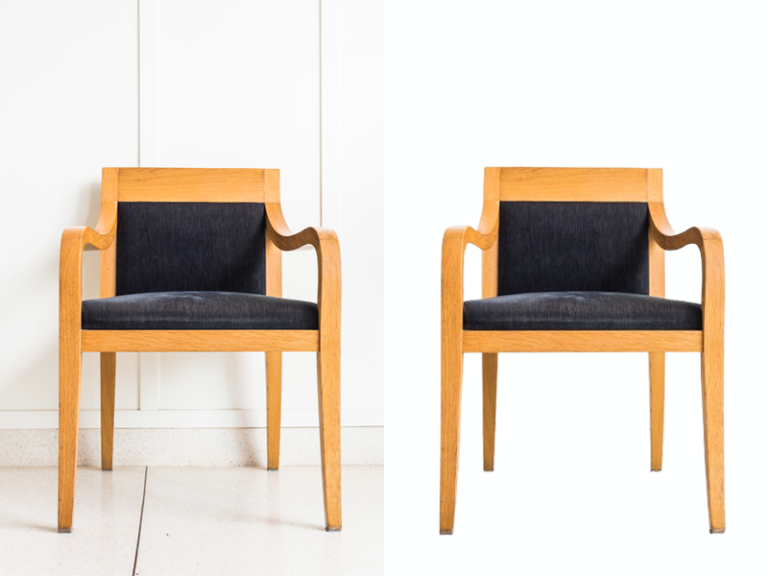
A clipping path Photoshop workflow shines on subjects with clean, defined edges, products, bottles, gadgets, furniture, where you want the sharpest possible cutout. For soft or wispy edges like hair and fur, masking (or the Channels method) works better. Choosing the right approach for the image is the first step to a clean result.
Step 1: Open Your Image
Open your photo in Photoshop by going to File > Open. If you’re practicing, pick something simple with a clear outline, like a mug. Zoom in until you can see the edge of your subject. You can’t trace an edge well if you can’t see it.Step 2: Trace the Subject with the Pen Tool
Press P to grab the Pen tool and make sure it’s set to Path mode. Click to place anchor points right along the edge of your subject. On curves, click and drag so the line follows the shape smoothly. Keep going all the way around, then click your first point to close the path.
Step 3: Turn the Path into a Selection
Open the Paths panel, right-click your path, and choose Make Selection. A small box pops up where you can set the feather radius. Try 0.5 pixels. That’s just enough to soften the edge so it blends in, without leaving a rough line or a white halo around your subject.Step 4: Copy the Subject onto Its Own Layer
With the selection still active, press Ctrl/Cmd+C and then Ctrl/Cmd+V. Or just hit Ctrl/Cmd+J, which does the same thing in one go (it’s Layer via Copy). Your subject now sits on its own layer, so you can hide or delete the original whenever you like.
Step 5: Remove or Replace the Background
Hide the original background layer, and your subject shows up on a transparent background. Want to keep that transparency? Save the file as a PNG. If you’d rather put something else behind it, add a new layer underneath the subject and fill it with white, a solid color, or a whole new scene. And because a clipping path doesn’t touch your original photo, you can always come back later and tweak or recolor the subject. The line is your clipping path.
Practice, and When to Outsource
The Pen tool takes practice to master. Your first Photoshop clipping path will be slower, and the edges won’t be perfectly clean, but you’ll improve quickly. If you only have a few images to cut out, doing it yourself works fine. But if you have a big catalog that needs lots of clean, consistent cutouts on a tight timeline, businesses usually hand off to a professional clipping path service.